

How to choose the right load cell for your project-Selection guide
🔧 Technical level: Intermediate to Advanced |
📌 Topic: Load cell selection guide for engineers and buyers
Choosing the right load cell can make or break your weighing or force measurement project. Select the wrong capacity, and your sensor may overload and fail on day one. Pick the wrong material, and it corrodes within months. Choose the wrong type, and it simply won’t fit your mechanical design.
With dozens of load cell types — S-type, shear beam, compression, single-point, canister, pancake, miniature — and hundreds of models on the market, the selection process can feel overwhelming. But it doesn’t have to be. Once you understand the seven key selection criteria and how they map to your application, the right choice becomes clear.
This guide walks you through everything you need to know: how strain gauge load cells work, the materials and components inside them, the 12 major load cell types and when to use each, a step-by-step selection methodology, and the common mistakes to avoid. Whether you’re building a kitchen scale, a industrial platform scale, a crane weighing system, or an IoT smart device, this guide will help you make the right choice.
📋 Table of Contents
- What Is a Resistance Strain Type Load Cell?
- Main Components: Elastic Element, Strain Gauge & Bridge
- Elastic Element Materials: Alloy Steel vs Stainless Steel vs Aluminum
- Strain Gauge Types & Selection
- How the Wheatstone Bridge Works
- 12 Major Load Cell Types by Shape & Structure
- Key Specifications You Must Understand
- 7-Step Load Cell Selection Guide
- How to Calculate the Right Capacity
- Accuracy Classes Explained (OIML R60)
- Environmental Protection & IP Ratings
- Signal Output Types: Analog vs Digital
- 7 Common Mistakes to Avoid
- Application-Specific Recommendations
- Frequently Asked Questions
- Conclusion
1. What Is a Resistance Strain Type Load Cell?
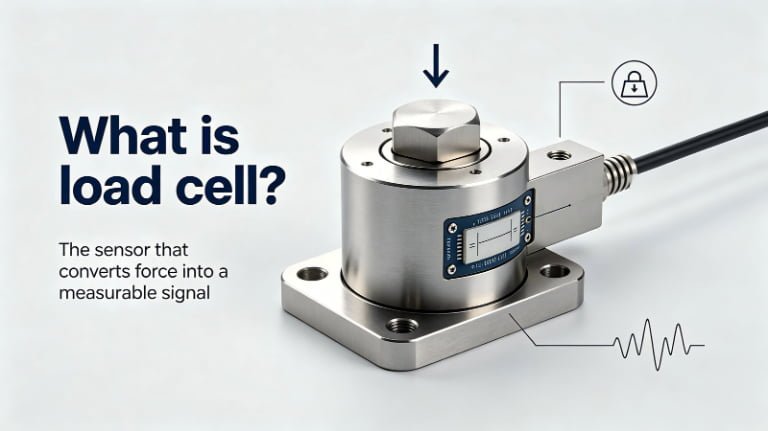
A resistance strain type load cell is the most widely used force-to-electrical-signal transducer in the world. It works by detecting the microscopic deformation of a strain gauge — a small device whose electrical resistance changes when it is stretched or compressed. When force is applied to the load cell body (the “spring element”), the bonded strain gauge deforms along with it, causing a measurable resistance change. This change is converted into an electrical signal proportional to the applied force.
Strain gauge load cells dominate industrial weighing because they offer an unbeatable combination of high accuracy (up to 1 part in 10,000), wide capacity range (grams to thousands of tons), excellent long-term stability, and cost-effectiveness. They are used in everything from kitchen scales and medical devices to truck scales and aerospace test equipment.
Other load cell technologies exist — piezoelectric, capacitive, magnetoelastic, hydraulic — but strain gauge types account for over 90% of all weighing applications due to their versatility and maturity. This guide focuses exclusively on resistance strain type load cells.
2. Main Components: Elastic Element, Strain Gauge & Bridge
A strain gauge load cell consists of three fundamental components working together:
| Component | Function | Why It Matters |
|---|---|---|
| Elastic Element (Spring Element) | Mechanical body that deforms predictably under load; distributes force to the strain gauge | Determines capacity, overload resistance, and material choice |
| Resistance Strain Gauge | Tiny grid of fine wire/foil bonded to the elastic element; converts deformation into resistance change | Determines accuracy, creep performance, and temperature stability |
| Wheatstone Bridge Circuit | Electrical circuit combining 2–4 strain gauges; converts small resistance changes into measurable voltage | Determines sensitivity (mV/V output) and temperature compensation |
The performance of a load cell depends on the quality of all three. A premium strain gauge bonded to a poorly machined elastic element will still produce inaccurate results. That’s why leading manufacturers control the entire process — from material selection to strain gauge bonding to bridge compensation — in-house.
3. Elastic Element Materials: Alloy Steel vs Stainless Steel vs Aluminum
The elastic element is the mechanical heart of the load cell. The material must have a high elastic limit, low hysteresis, good temperature characteristics, and excellent fatigue resistance. Three metals dominate the industry:
| Material | Pros | Cons | Best For |
|---|---|---|---|
| Alloy Steel (e.g., 40CrNiMoA, 42CrMo) |
High strength, excellent elasticity, low cost, mature processing | Susceptible to corrosion without protective coating | Industrial scales, platform scales, most general-purpose load cells |
| Stainless Steel (e.g., 17-4PH, 630) |
Excellent corrosion resistance, food-grade, hygienic, long lifespan | Higher cost, harder to machine, slightly lower elasticity than alloy steel | Food industry, pharmaceutical, marine, chemical, washdown environments |
| Aluminum Alloy (e.g., 2024, 7075) |
Lightweight, easy to machine, low cost, high sensitivity per unit strain | Lower strength, limited capacity range, susceptible to corrosion | Single-point load cells, kitchen scales, retail scales, low-capacity applications |
Material Requirements for Elastic Elements
1. High elastic limit and strength — must return to original shape after unloading
2. Good manufacturability — easy to machine, heat treat, and finish
3. Stable elastic modulus across temperatures — minimal sensitivity drift
4. Low elastic hysteresis — minimal difference between loading and unloading curves
5. Low residual stress after hot and cold processing — for long-term stability
6. Good impact toughness — survives shock loads and accidental overloads
7. Low coefficient of thermal expansion — minimal dimensional change with temperature
How Material Properties Affect Performance
Elastic modulus (E) determines the relationship between stress and strain. Within the safe load range, E must remain constant. However, E decreases as temperature rises, causing sensitivity drift — this is why temperature compensation is essential. The material’s elastic hysteresis directly impacts the load cell’s hysteresis error and creep performance: a higher elastic limit means less hysteresis and better repeatability.
Thermoelastic effect also plays a role: as temperature increases, atomic bonds weaken and the elastic modulus decreases. For dynamic weighing sensors, this shifts the resonant frequency. These effects are compensated during manufacturing through strain gauge selection and bridge circuit design, but understanding them helps you choose the right material for extreme environments.
4. Strain Gauge Types & Selection
The strain gauge is the sensing element. It works on a simple principle: R = ρL/A, where R is resistance, ρ is resistivity, L is wire length, and A is cross-sectional area. When the gauge is stretched, L increases and A decreases, so R increases. When compressed, R decreases. Within the elastic range, the resistance change rate ΔR/R is proportional to strain ΔL/L: ΔR/R = K × (ΔL/L), where K is the gauge factor (sensitivity).
| Category | Base Material / Foil | Key Features | Accuracy Class |
|---|---|---|---|
| General Purpose | Phenolic base, constantan foil | Temp self-compensation, good flexibility, easy bonding | 0.05 class |
| Polyimide base, constantan foil | High elongation, heat/moisture resistant, good insulation | ≤150°C precision | |
| Paper-acetal base, constantan foil | Thin, soft, easy to bond — for concrete structures | Stress analysis | |
| High Precision | Modified phenolic base, constantan foil | Temp + creep self-compensation | High precision |
| Modified phenolic base, karma foil | Temp + creep + modulus compensation, high impedance | High precision | |
| Special polyimide film, constantan foil | Excellent moisture stability, low creep | C3 and above | |
| Glass-fiber epoxy, constantan foil | Heat/moisture resistant, stable, low creep | C3 and above | |
| High Temperature | Glass-fiber polyimide, karma foil | Excellent heat resistance, strong insulation | Up to 250°C |
4 Factors for Strain Gauge Selection
1. Stress level, accuracy requirement, humidity, and elastomer material — determines base material and foil type
2. Strain zone size — determines gauge dimensions and grid pattern
3. Lead resistance, signal-to-noise ratio, and power consumption — determines impedance and wiring
4. Sensitive grid structure — determines measurement direction and compensation type
5. How the Wheatstone Bridge Works
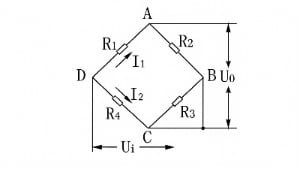
The Wheatstone bridge is the measurement circuit that converts tiny resistance changes in the strain gauges into a measurable voltage signal. It is the most widely used circuit in strain gauge measurement due to its high sensitivity, wide range, simple structure, high accuracy, and ease of temperature compensation.
The bridge has four arms (R1, R2, R3, R4). In a full-bridge configuration (most common in load cells), all four arms are strain gauges bonded to the elastic element. When force is applied, two gauges experience tension (resistance increases) and two experience compression (resistance decreases), maximizing the output signal. The output voltage U₀ is the difference between two voltage dividers:
The typical output of a strain gauge load cell is 1–3 mV/V at full capacity. This means a load cell with 2 mV/V sensitivity and 10V excitation produces 20 mV at full load — a very small signal that requires amplification (via instruments like the HX711 or NAU7802) before it can be read by a microcontroller or display.
6. 12 Major Load Cell Types by Shape & Structure
Load cells are classified by their physical shape and force-measuring structure. Each type is optimized for specific loading directions, capacity ranges, and installation constraints. Here are the 12 most common types:
| Type | Loading Direction | Capacity Range | Key Application |
|---|---|---|---|
| S-Type | Tension & compression | 5 kg – 20 t | Hopper/tank weighing, hanging scales, material testing |
| Compression | Compression only | 50 kg – 500 t | Truck scales, silos, heavy industrial weighing |
| Tension | Tension only | 50 kg – 100 t | Crane scales, cable tension, elevator overload |
| Shear Beam | Shear (bending) | 50 kg – 50 t | Platform scales, conveyor scales, tank weighing |
| Ring/Donut | Compression (centered) | 100 kg – 500 t | Bolt force measurement, press monitoring |
| Pancake | Compression & tension | 100 kg – 100 t | Low-profile applications, fatigue testing |
| Miniature | Compression/tension | 1 g – 500 kg | Aerospace, robotics, medical devices, QA testing |
| Low-Profile | Compression | 500 kg – 100 t | Vehicle testing, structural monitoring |
| Canister | Compression | 10 t – 1,000 t | Heavy-duty industrial, truck/rail scales |
| Single Point | Bending (off-center) | 300 g – 500 kg | Retail scales, bench scales, packaging machines |
| Micro | Bending | 100 g – 50 kg | Kitchen scales, body scales, IoT smart devices |
| Shaft Pin | Shear (rotating) | 500 kg – 200 t | Crane pulleys, shackles, stage equipment |
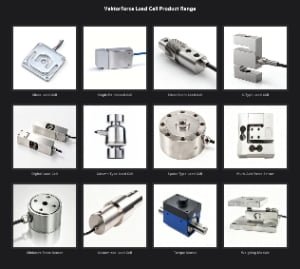
The S-type is the most versatile — it measures both tension and compression, making it ideal for hopper weighing and hanging applications. Single-point load cells are unique because they compensate for off-center loading, allowing a platform scale to use just one sensor instead of four. Shear beam types are preferred for industrial platform scales because they’re insensitive to lateral forces. Canister and compression types handle the heaviest loads — up to 1,000 tons.
7. Key Specifications You Must Understand
Before selecting a load cell, you need to understand these critical specifications that appear on every datasheet:
| Specification | What It Means | Typical Value |
|---|---|---|
| Rated capacity | Maximum load the sensor is designed to measure accurately | 1 kg – 1,000 t |
| Sensitivity (rated output) | Signal output per volt of excitation at full capacity | 1.0–3.0 mV/V (2.0 typical) |
| Non-linearity | Maximum deviation from a straight line between zero and full load | ±0.01% – ±0.05% FS |
| Hysteresis | Difference between readings when approaching the same load from above vs below | ±0.01% – ±0.05% FS |
| Repeatability | Difference between repeated readings of the same load under identical conditions | ±0.01% – ±0.03% FS |
| Creep (30 min) | Change in output over time under constant load at constant temperature | ±0.02% – ±0.05% FS |
| Safe overload | Maximum load beyond rated capacity without permanent damage | 120% – 150% of capacity |
| Ultimate overload | Load at which the sensor may be permanently damaged or destroyed | 200% – 300% of capacity |
| Input/Output impedance | Bridge resistance at excitation and signal terminals | 350Ω (most common), 700Ω, 1kΩ |
| Insulation resistance | Resistance between bridge circuit and sensor body (indicates moisture ingress) | ≥ 5,000 MΩ at 50VDC |
| Temperature range | Compensated range (accuracy guaranteed) and operating range (safe to use) | Compensated: -10°C to +40°C; Operating: -20°C to +60°C |
8. 7-Step Load Cell Selection Guide
Follow these seven steps to identify the right load cell for your project. Each step narrows your options until the best choice becomes clear:
Step 1: Determine Weight Capacity
Calculate the maximum weight you need to measure (including the container/platform dead weight). Select a load cell rated for 150–200% of your maximum load. As a rule of thumb, using 50–70% of the sensor’s full range gives the best balance of accuracy and overload protection. For example, if your maximum load is 60 kg, choose a 100 kg load cell.
Step 2: Define Required Accuracy
What resolution do you need? A kitchen scale needs 1-gram accuracy on a 5 kg load (0.02%). A truck scale needs 10 kg accuracy on 80,000 kg (0.01%). Accuracy requirements determine the load cell class (C1–C6 per OIML R60) and the number of divisions (nmax). Higher accuracy costs more — don’t overspecify.
Step 3: Determine Platform/Tray Size
The platform size determines which load cell types are suitable. Single-point load cells handle platforms up to a certain size (e.g., 400×400 mm) without needing multiple sensors. Larger platforms require 4 shear beam or compression load cells at the corners. Platform size also affects the lever arm on bending-type sensors.
Step 4: Check Installation Space
Measure the available installation space, including height, width, and depth constraints. Some applications (like embedded scales in machinery) require low-profile or miniature load cells. Check mounting hole patterns, cable exit direction, and whether the sensor needs to be bolted from above or below.
Step 5: Assess the Working Environment
Consider: temperature range (extreme heat/cold?), humidity (washdown? submersion?), corrosive chemicals (acids? saltwater?), dust/dirt, vibration, and electromagnetic interference. This determines material choice (stainless steel for corrosive environments), IP rating (IP65 for splash, IP67 for submersion, IP68 for continuous immersion), and whether hermetically sealed gauges are needed.
Step 6: Static vs Dynamic Weighing
Static weighing (object placed and stationary) can use any load cell type. Dynamic weighing (object moving on a conveyor, filling, or batching) requires load cells with faster response times, higher natural frequency, and better fatigue resistance. Shear beam and compression types typically handle dynamic loads better than bending beam types.
Step 7: Describe Your Project to the Supplier
The more context you provide, the better the recommendation. Tell us: what are you building? What are you weighing? What’s the budget? What certifications do you need (OIML, NTEP, ATEX, CE)? We’ve been in the load cell industry for many years and can recommend the optimal model based on your complete application — often saving you time, money, and engineering rework.
9. How to Calculate the Right Capacity
One of the most common mistakes is choosing a capacity that’s either too small (overload risk) or too large (poor resolution). Here’s the proper calculation method:
Formula (single load cell):
Required capacity = (Dead load + Max live load) × Safety factor
Formula (4 load cell system):
Required capacity per cell = (Dead load + Max live load) × Safety factor ÷ 4
Where:
- Dead load = weight of the platform, container, hopper, or frame that sits on the load cell permanently
- Max live load = maximum weight of the product/material being weighed
- Safety factor = 1.5 to 2.0 (to account for shock loads, off-center loading, and dynamic forces)
💡 Example: A hopper weighs 200 kg empty (dead load) and holds up to 800 kg of material (live load). Using 4 load cells with a safety factor of 1.5:
Capacity per cell = (200 + 800) × 1.5 ÷ 4 = 375 kg → Choose 500 kg load cells
The load cell will then operate at approximately 50% of its rated capacity under normal conditions (500 kg cell, 250 kg actual load per cell), which is the sweet spot for accuracy and longevity.
10. Accuracy Classes Explained (OIML R60)
The OIML R60 international standard classifies load cells by accuracy, from C1 (lowest) to C6 (highest). The class designation also includes the maximum number of divisions (nmax), which determines the resolution:
| OIML Class | Max Divisions | Typical Application | Cost Level |
|---|---|---|---|
| C1 | 1,000 | Simple industrial weighing, batch counting | Low |
| C2 | 2,000 | Platform scales, floor scales | Low-Medium |
| C3 | 3,000 | Retail scales, legal-for-trade, checkweighing | Medium |
| C4 | 4,000 | High-precision platform scales | Medium-High |
| C5 | 5,000 | Precision lab balances, force measurement | High |
| C6 | 6,000+ | High-resolution lab/precision balances | Highest |
💡 Rule of Thumb: For commercial trade (selling goods by weight), you need at least C3 class (3,000 divisions) and NTEP or OIML certification. For internal process control, C1 or C2 is usually sufficient. Don’t pay for C6 if C3 does the job — the cost difference can be 5–10×.
11. Environmental Protection & IP Ratings
The Ingress Protection (IP) rating tells you how well the load cell is sealed against dust and water. For outdoor or industrial environments, this is critical:
| IP Rating | Protection Level | Suitable Environment |
|---|---|---|
| IP54 | Dust-protected, splash-resistant | Indoor, clean environments, office scales |
| IP65 | Dust-tight, low-pressure water jets | Light industrial, covered outdoor use |
| IP66 | Dust-tight, powerful water jets | Washdown environments, food processing |
| IP67 | Dust-tight, temporary submersion (1m/30min) | Outdoor, marine, harsh industrial |
| IP68 | Dust-tight, continuous submersion | Underwater, underground mining |
For food/pharmaceutical applications, also look for hermetically sealed strain gauge compartments (welded seal, not just glue) and stainless steel construction. For explosive atmospheres (chemical plants, mines), choose load cells with ATEX or IECEx certification.
12. Signal Output Types: Analog vs Digital
| Output Type | Signal | Pros | Cons |
|---|---|---|---|
| Analog (mV/V) | 1–3 mV/V raw signal | Lowest cost, universal compatibility, fast response | Needs external amplifier; susceptible to noise over long cable runs |
| Amplified (V/mA) | 0–5V, 0–10V, 4–20mA | Ready for PLC/DAQ; 4–20mA good for long distances | Higher cost; fixed range; less flexible |
| Digital (RS485/Modbus) | Digital protocol, built-in ADC | Noise immunity, addressable, diagnostics, long cable runs | Highest cost; protocol-specific; needs compatible controller |
| Wireless/IoT | WiFi, BLE, LoRa, NB-IoT | No cabling needed; cloud connectivity; remote monitoring | Battery management; data security; highest cost |
For most new projects, analog mV/V output with an external amplifier (like HX711 for microcontrollers, or a dedicated weight transmitter for industrial PLCs) remains the most cost-effective and flexible choice. Choose 4–20mA for long cable runs in noisy industrial environments. Choose digital RS485/Modbus when you need multiple sensors on one bus, built-in diagnostics, or high noise immunity.
13. 7 Common Mistakes to Avoid
❌ Mistake 1: Choosing capacity too close to maximum load. If your max load is 90 kg and you buy a 100 kg load cell, you have no overload margin. A single shock load can permanently damage the sensor. Always use 50–70% of rated capacity.
❌ Mistake 2: Ignoring dead weight. A hopper that weighs 500 kg empty still loads the sensors. If you only sized for the 1,000 kg of material, your sensors are already at 33% capacity before any product is added.
❌ Mistake 3: Using aluminum load cells in corrosive environments. Aluminum corrodes quickly in humid, salty, or chemical environments. Use stainless steel (17-4PH) for food, marine, and chemical applications.
❌ Mistake 4: Overlooking temperature compensation. If your sensor operates in an environment with wide temperature swings (outdoor, near furnaces), standard compensation (-10°C to +40°C) may not be enough. Request extended compensation and add a temperature sensor for software correction.
❌ Mistake 5: Using a single-point load cell on a platform larger than its rated size. Single-point cells have a maximum platform size (e.g., 350×350 mm). Exceeding this causes off-center loading errors. Use 4 shear beam load cells instead for larger platforms.
❌ Mistake 6: Not using a junction box for multi-cell systems. With 4 load cells, each may have slightly different output. A junction box with trimming potentiometers equalizes the signals. Without it, corner loading errors will make your scale inaccurate.
❌ Mistake 7: Overtightening mounting bolts. Over-torquing mounting bolts can introduce residual stress into the elastic element, causing zero drift and hysteresis errors. Always follow the manufacturer’s torque specifications.
14. Application-Specific Recommendations
| Application | Recommended Type | Recommended Material | Key Consideration |
|---|---|---|---|
| Kitchen / bathroom scale | Micro / single-point | Aluminum | Low cost, small size |
| Retail / bench scale | Single-point | Aluminum | Off-center compensation, C3 class |
| Platform / floor scale | 4× shear beam | Alloy steel | Junction box with trimming |
| Hopper / tank weighing | S-type or compression | Alloy steel / stainless | Include dead load in capacity calc |
| Crane / hanging scale | S-type or tension | Alloy steel | Safety factor ≥ 2.0 |
| Truck / rail scale | Compression / canister | Alloy steel | High shock load resistance |
| Food / pharmaceutical | Shear beam / single-point | Stainless steel (17-4PH) | IP67+, hermetically sealed, hygienic design |
| IoT / smart device | Micro / miniature | Aluminum / stainless | Low power, compact, cost-sensitive |
| Marine / outdoor | S-type / shear beam | Stainless steel | IP67+, corrosion resistance, temp compensation |
| Explosive atmosphere | Compression / S-type | Stainless steel | ATEX / IECEx certification required |
15. Frequently Asked Questions
16. Conclusion
Selecting the right load cell comes down to understanding your application’s seven key requirements: capacity, accuracy, platform size, installation space, environment, loading type, and overall project goals. By working through the 7-step selection guide in this article, you can systematically narrow your options from hundreds of models to the handful that truly fit your needs.
Remember the golden rules: use 50–70% of rated capacity, don’t forget the dead load, match the material to the environment, and never skip the junction box on multi-cell systems. When in doubt, describe your project to your supplier — a few minutes of conversation can save weeks of engineering rework.
As a load cell manufacturer and exporter with years of industry experience, we help customers worldwide select the optimal sensor for their specific application — from kitchen scales to truck scales, from IoT smart devices to industrial automation. Contact our technical team for free consultation, product samples, and competitive wholesale pricing.
Need Help Choosing the Right Load Cell?
Tell us about your project and get free technical consultation, model recommendations, and wholesale pricing.
About the Author
Our team specializes in load cell manufacturing and export, supplying weighing sensors to industrial, medical, consumer, and IoT companies worldwide. With over 10 years of experience in strain gauge technology, we help customers select the optimal sensor for any application — from micro load cells for smart devices to canister load cells for heavy industry.
This article is for informational purposes only. Product specifications may vary by model and batch. Contact us for the latest datasheets and certification documents. All trademarks mentioned are property of their respective owners.